How to extract the Tenant ID, Client ID, Secret & Token information.
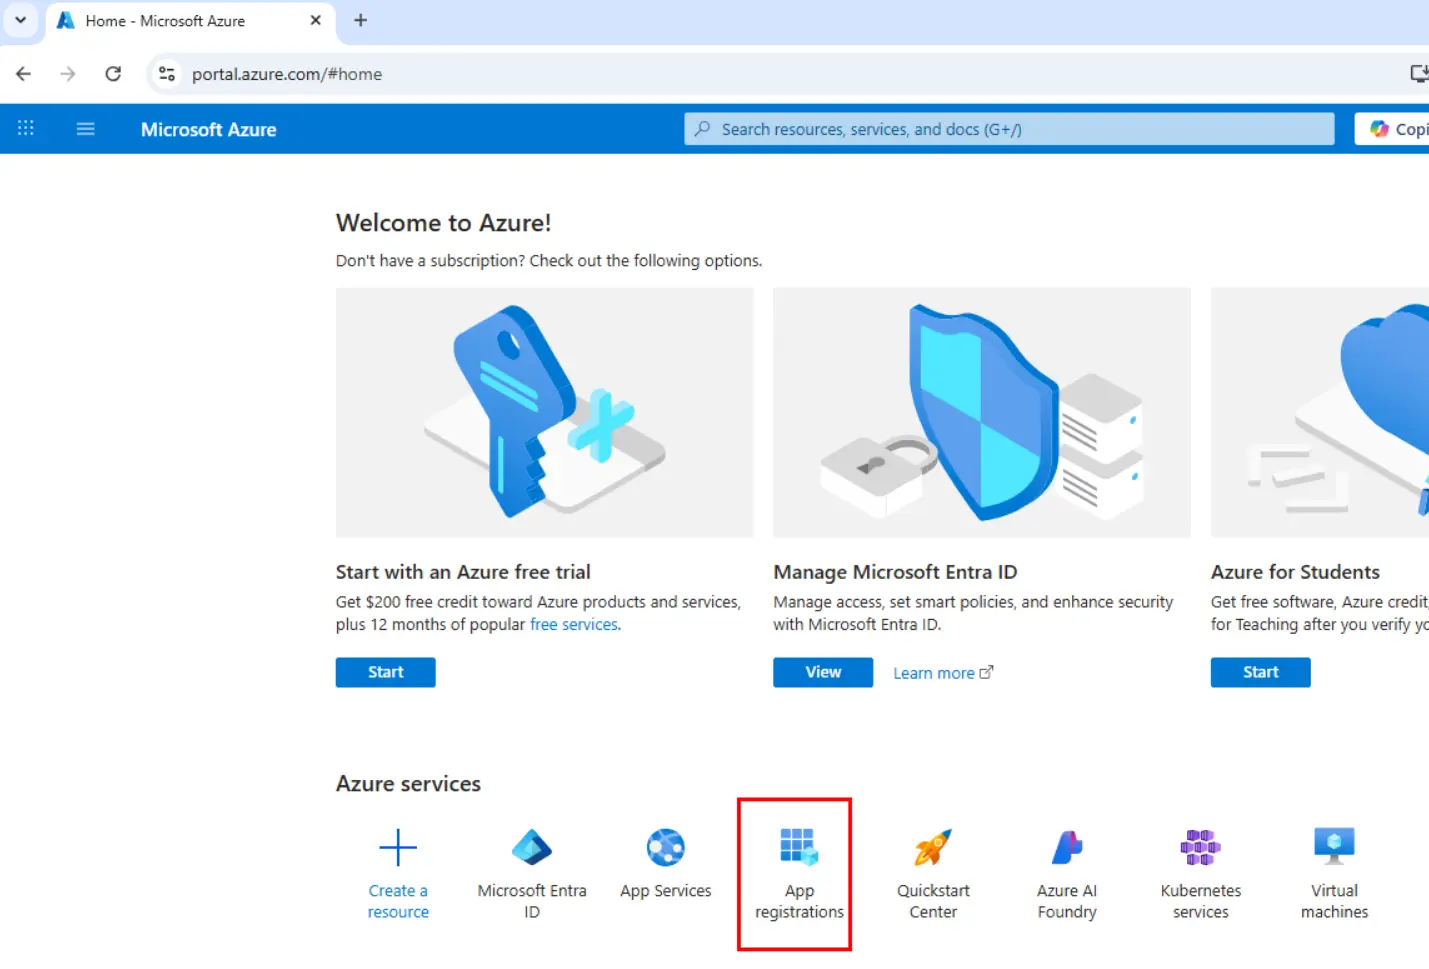
Go to your Azure admin portal and find the APP Registration.
It should be as a shortcut on the Azure Services section as indicated with the red box…
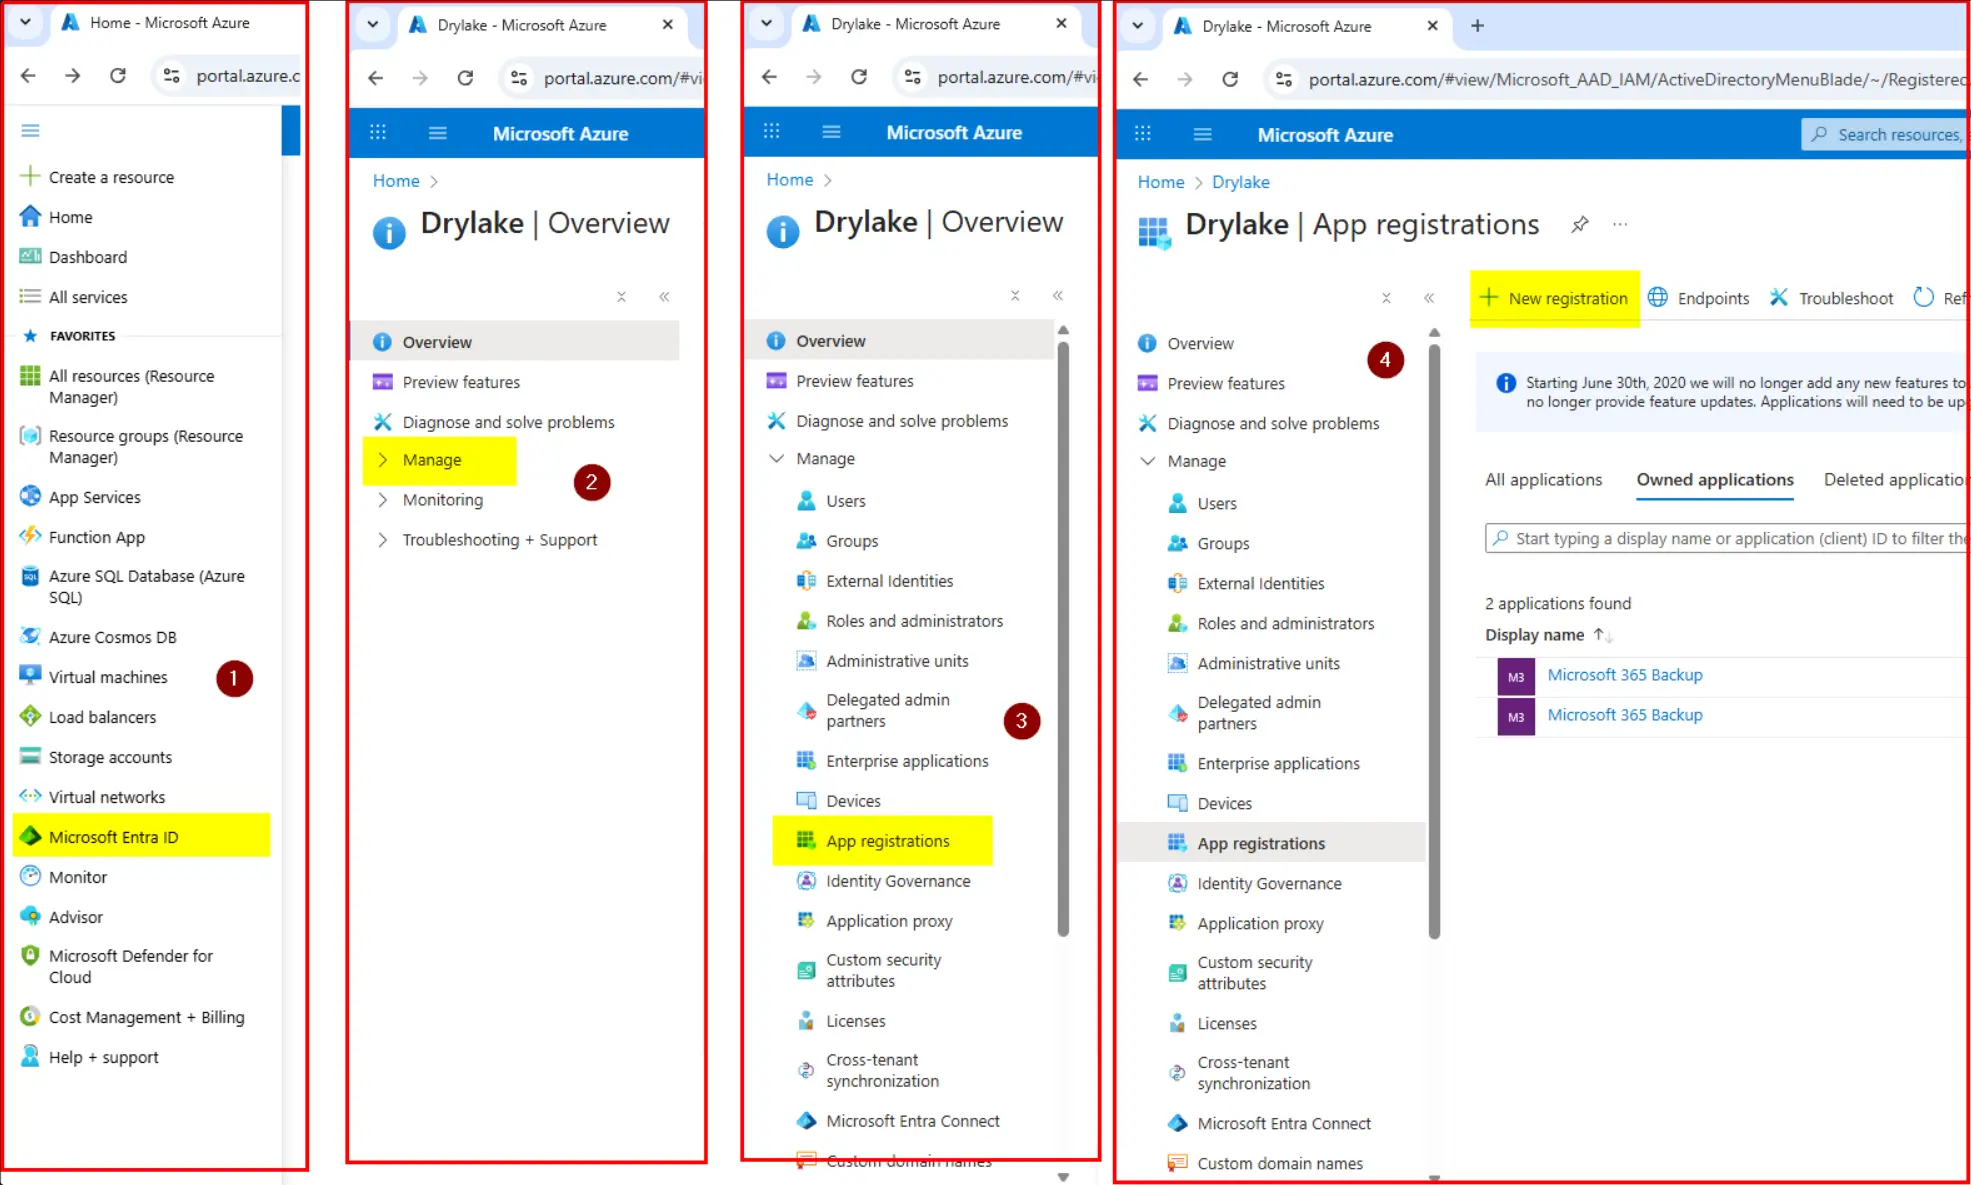
.. If not, follow the numbered menu navigation below:
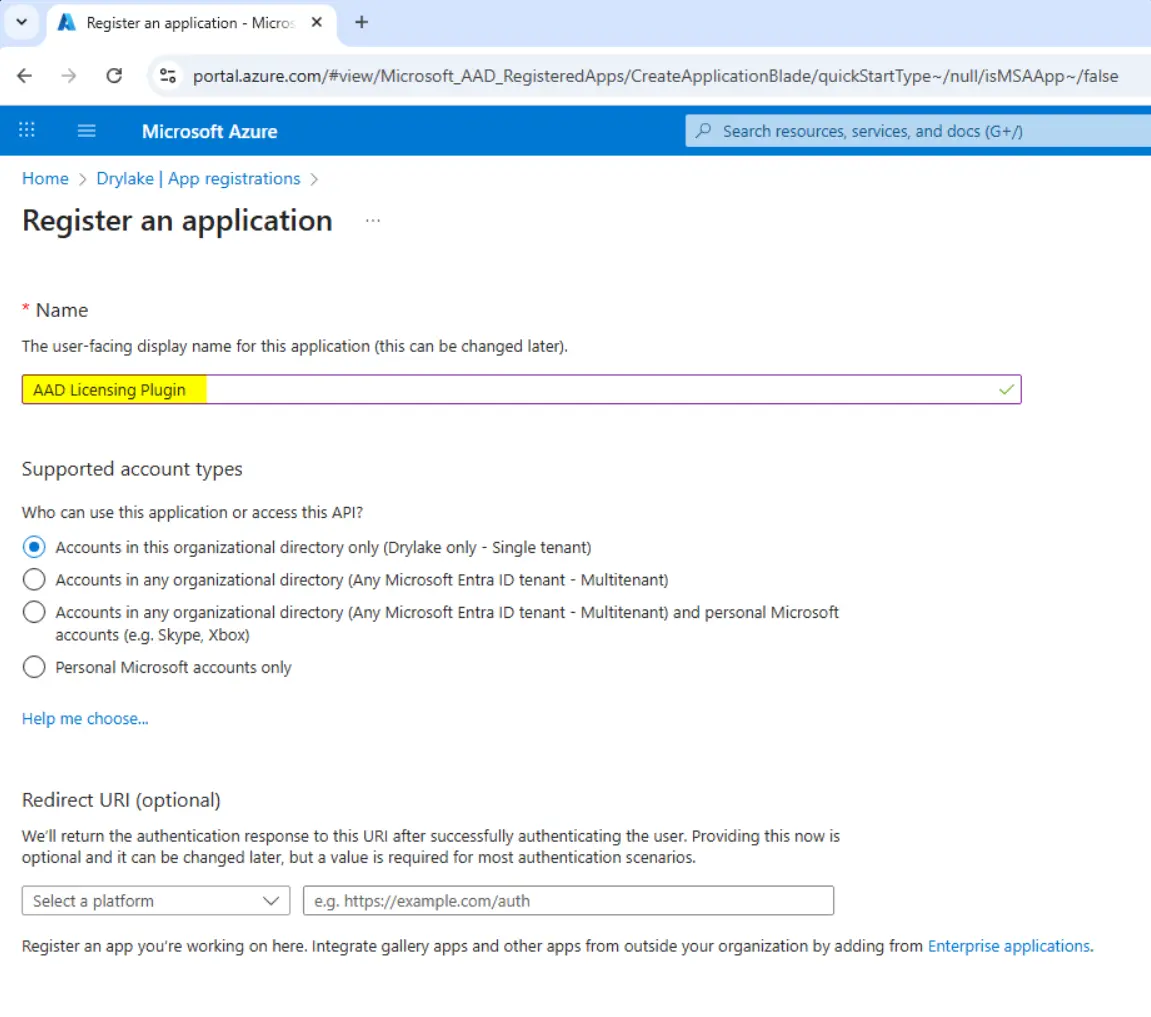
Enter the name of your App – in this example, the App will be called AAD Licensing Plugin…
This is to manage the licenses for an App called AAD (Adaptive Audience Display)
Continue to the next screen.
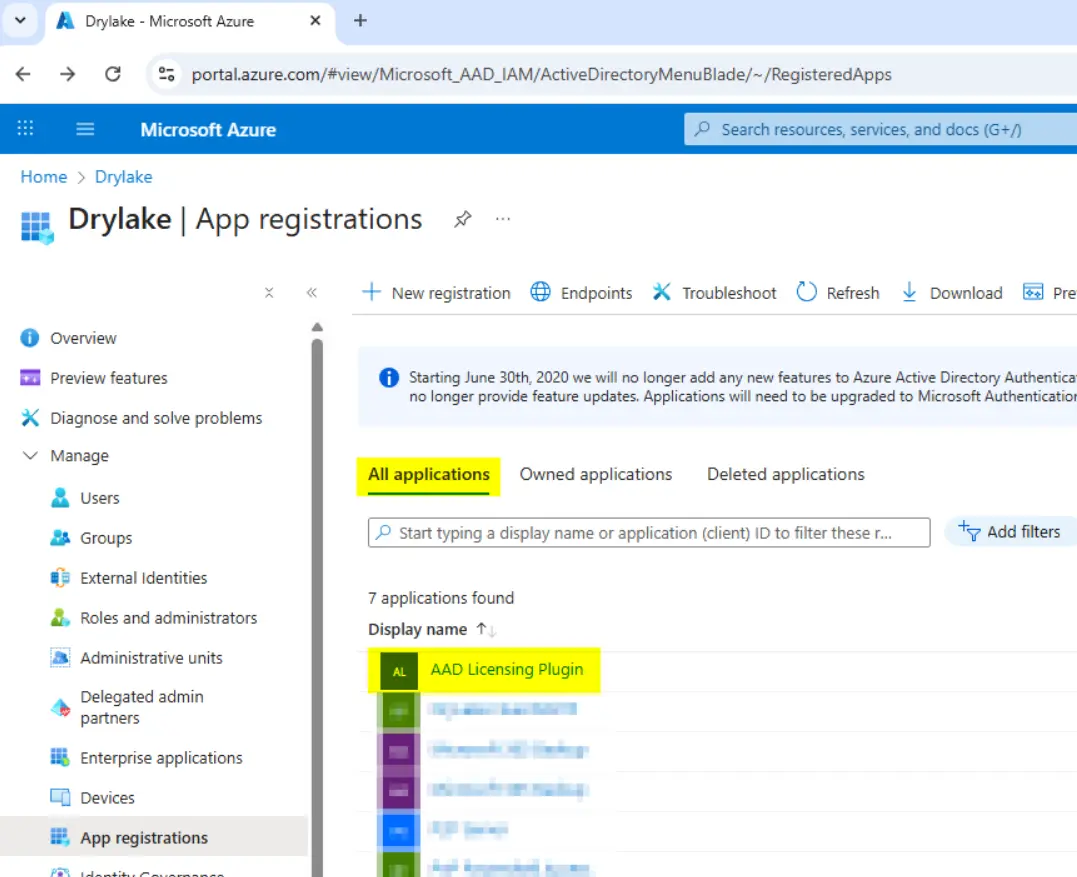
Change the focus to view ALL APPLICATIONS.
You should now see your new app listed.
Click your new app to enter its properties section.
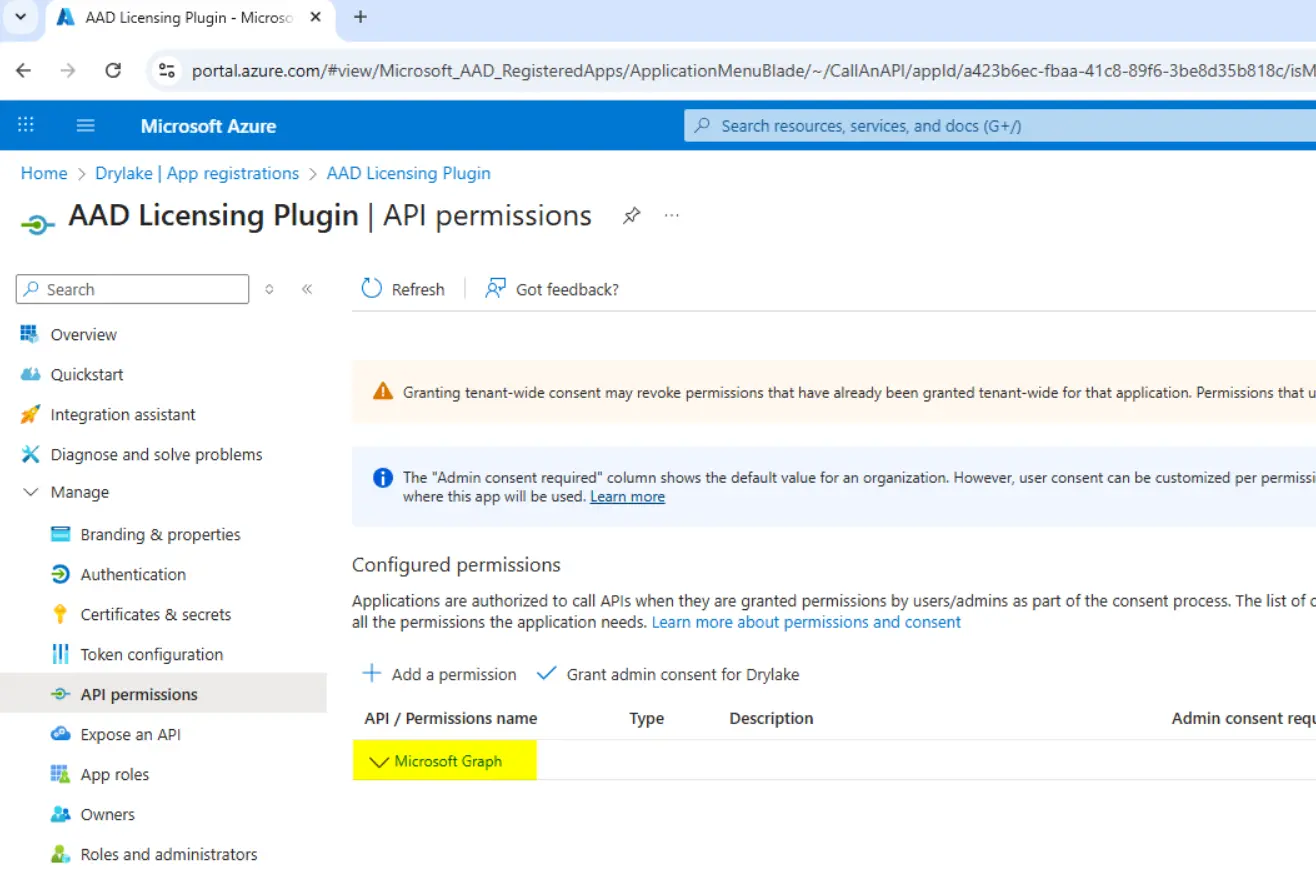
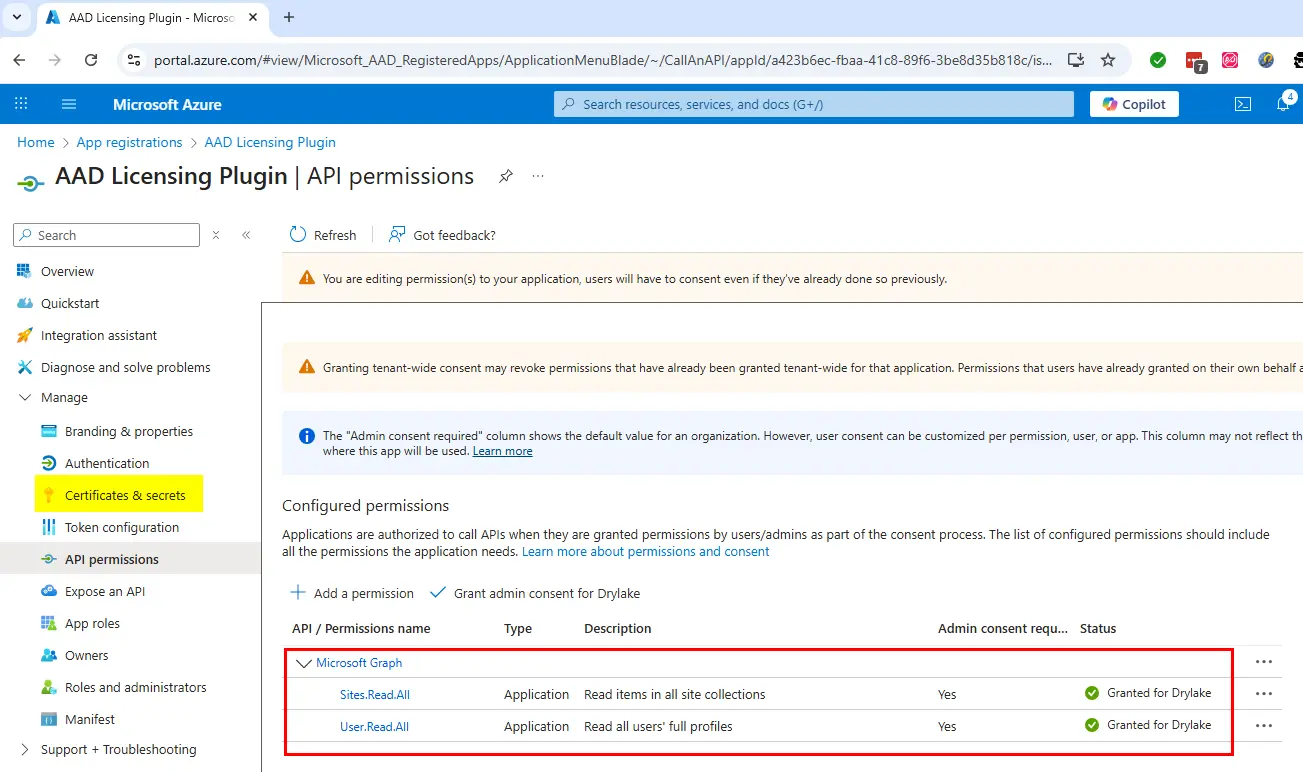
Select the API Permissions
This image shows the Tenant ID and Client ID, both of which are required for License Keep Lite.
We now need to add Microsoft Graph (Assuming its not already listed).
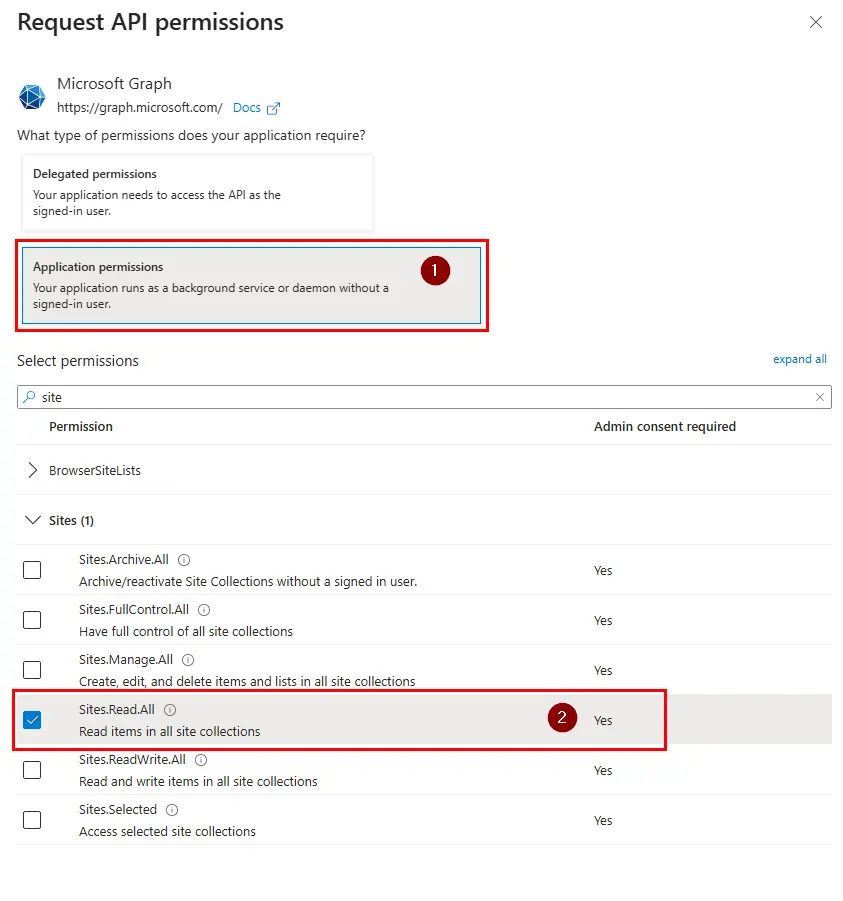
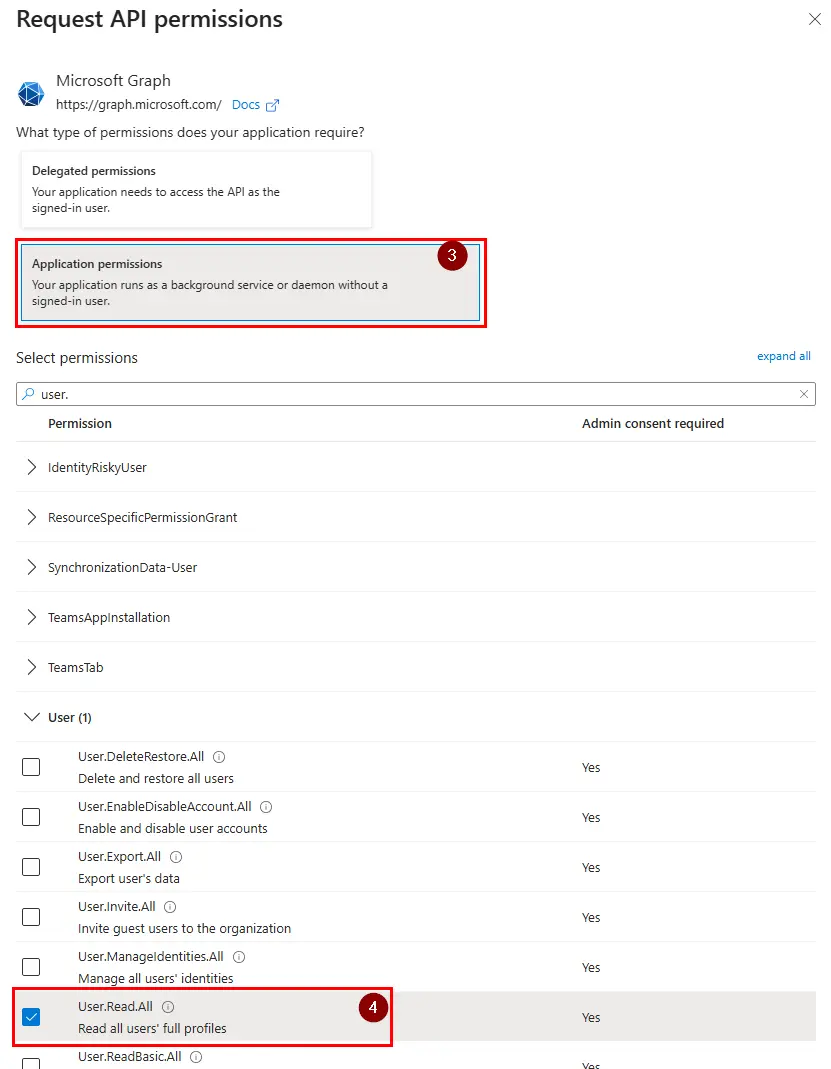
Click ADD A PERMISSION
In the menu on the right side of the screen, change focus to API’s MY ORGANIZATION USES.
In the filter box, start typing Microsoft Graph and it should filter down the results.
Select Microsoft Graph.
Microsoft Graph should now be listed.
Click it to enter its properties section.
Using the filter box, find the following API permissions:
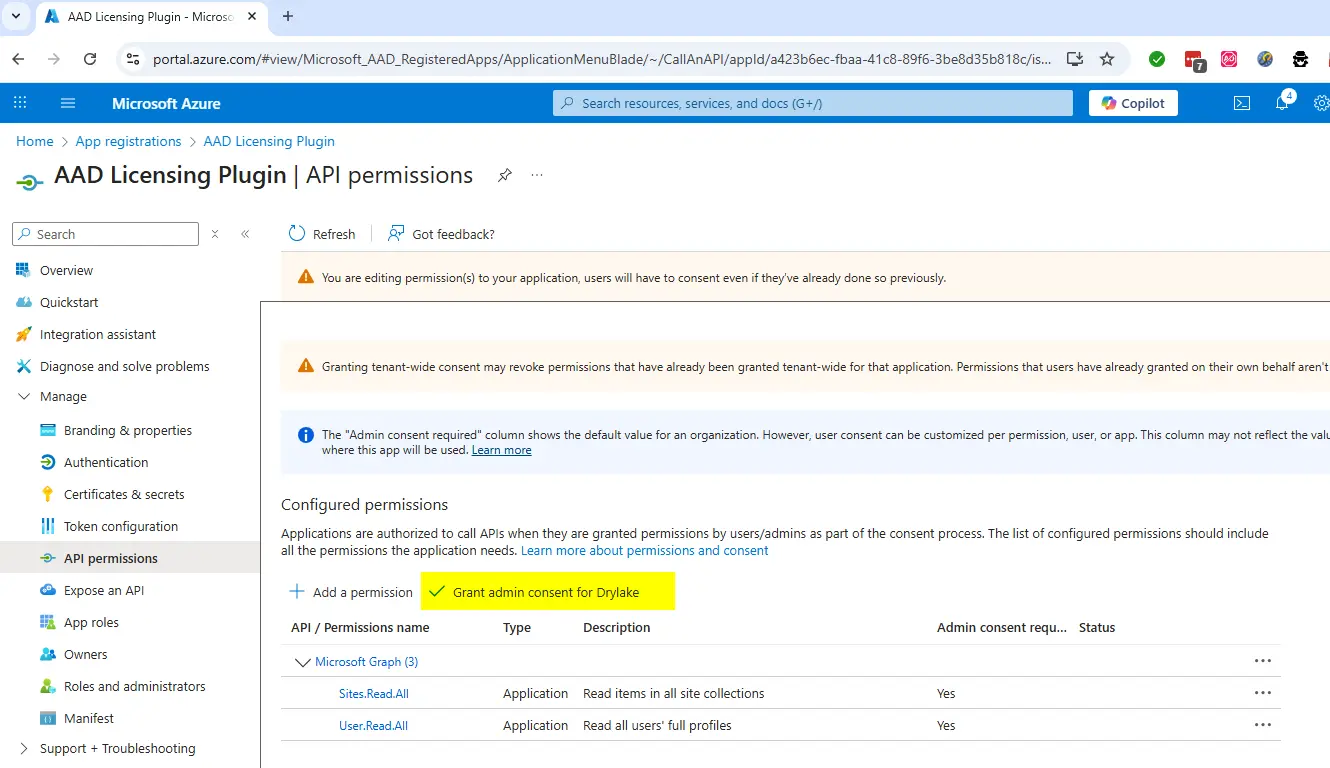
Then click UPDATE PERMISSIONS.
Now click GRANT ADMIN CONSENT to activate the permission.
It should now look like what you see in the red box below.
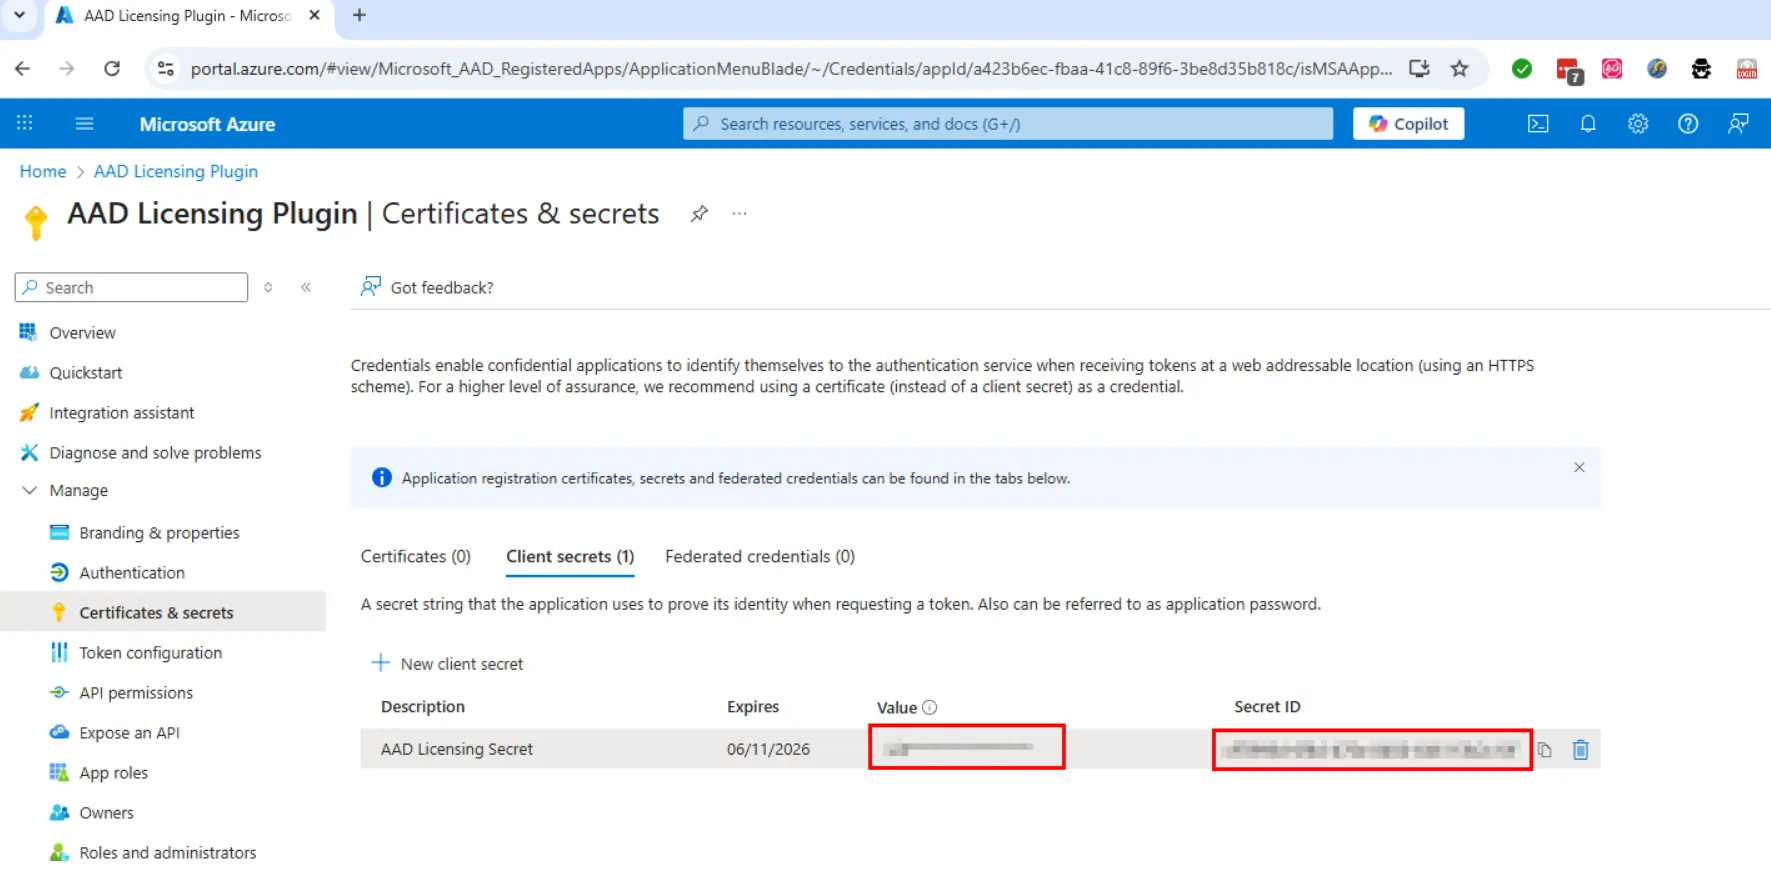
Select CERTIFICATES & SECRETS
We now need to create a secret.
Click NEW CLIENT SECRET
Give the secret a description and set the expiry time – I recommend 12 months, but it’s best to follow your own security compliance standard.
COPY THESE NOW…. the value will not be shown again.
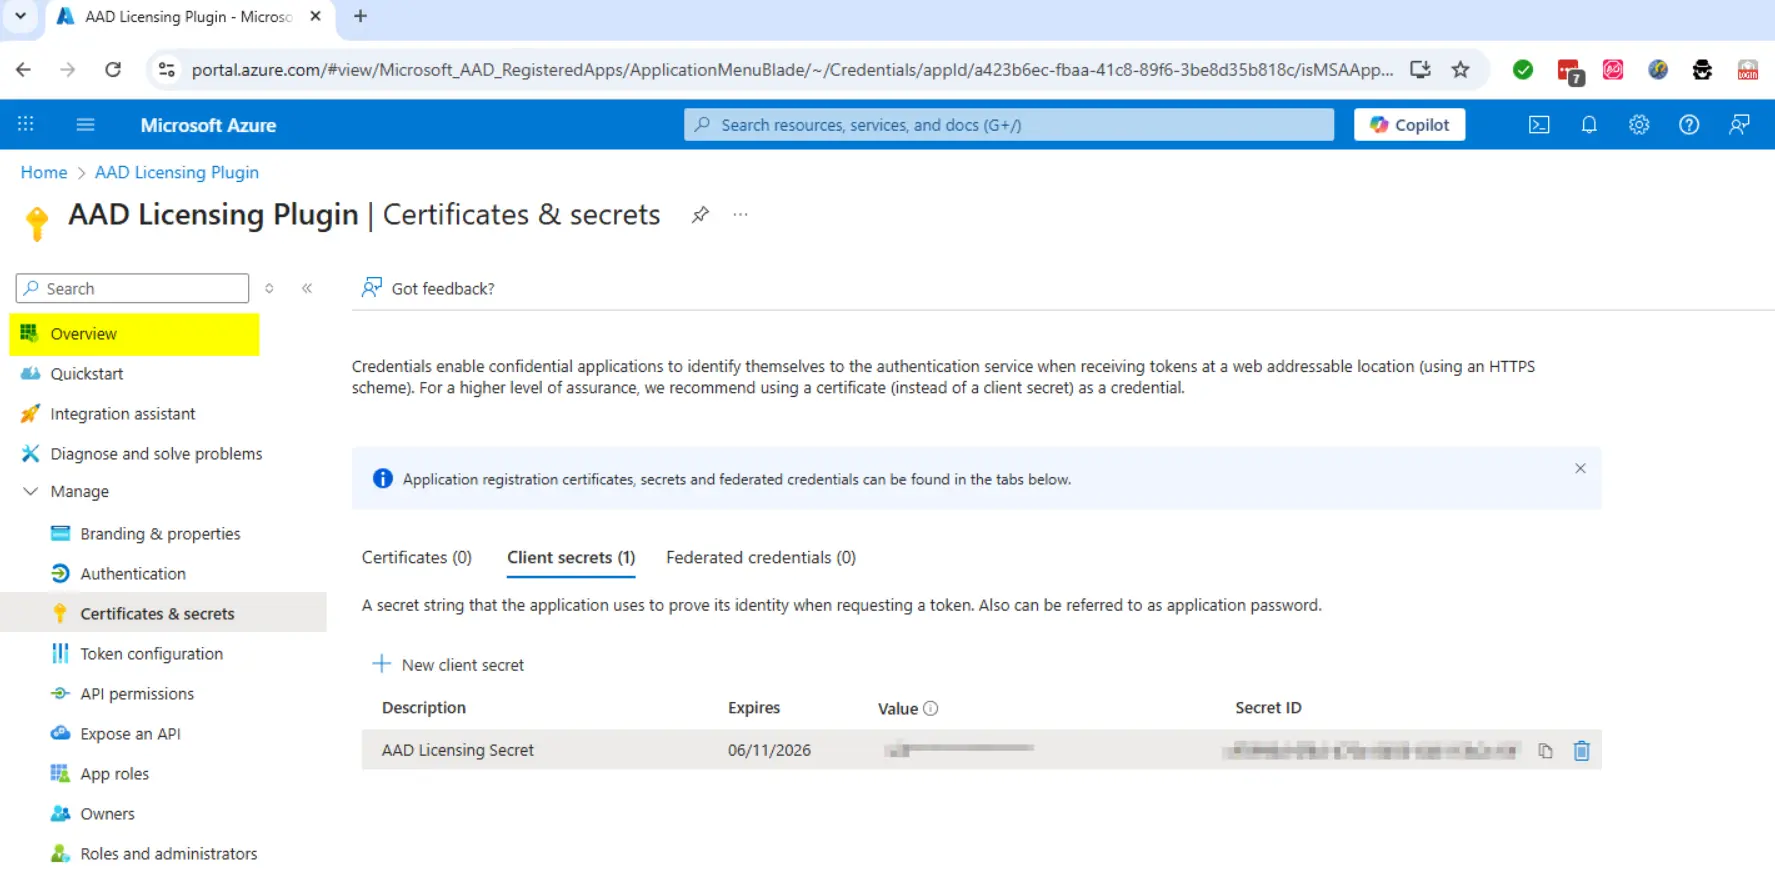
Once you have copied the values, select the OVERVIEW TAB
Along with the SECRET you just copied, also copy the CLIENT ID and TENANT ID and store securely for later use.